Showing posts with label Cheapskate Tips. Show all posts

Wednesday, December 16, 2015

Christmas Wreath Mishap

Another holiday, another wreath! 

I had been collecting expired bulbs from our Christmas lights with a goal to add them to a wreath. This was the year that I had enough of them. This Cheapskate Tip involves trash (expired bulbs) and ribbon. That's it!
Wrap ribbon around wreath, pinning the beginning and end into the wreath itself. I was partial to the curly ribbon at the end so I let it hang at the bottom.
Here, I individually wrapped floral wire around the thread of the bulb and created a hook formation of the wire and poked it into the ribbon and wreath, doing so all around the outer edge of the wreath. Of course, the dog must supervise this effort!
Closeup
Hooking in the bulbs
This takes a while...
Completed effort; bird's eye view
I then wrapped a string of tiny LED lights around the wreath and hung the wreath to see how it would look, and to add finishing touches. Notice a bulb missing here?...
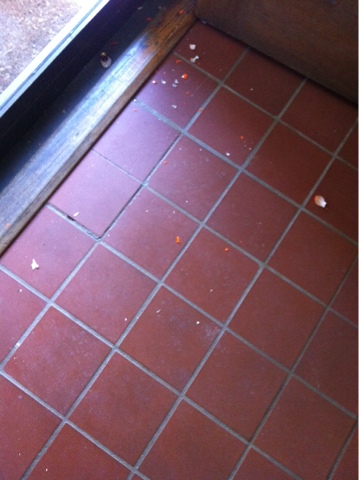
...Not all ideas are fruitful, and this is okay! Lesson learned...back to the drawing board.
Instead, I pulled all of the bulbs and twisted the wire together so that they formed a large bunch. 
I also decided to take the remaining ribbon and loop it three times at the bottom to create the look of gift wrap.
Wrap the bulb cluster wire around the bottom. They are not going anywhere this time!
I used a pillow ornament to cover the LED battery pack hanging in the middle of the wreath. This ornament was given to me years ago by a co-worker. I'm still perplexed by its message to this day, but I love it because of its double-meaning!
I added a bit more flair above the bulb cluster--red glitter foliage, purchased last year on clearance at a craft store. These little pieces are great for gift wrap too.
This festive little wreath took longer than anticipated, but hey...not all ideas can be fruitful. Mishaps force us to learn. Mishaps are great opportunities to laugh at yourself. Sometimes even, a better idea can evolve after a mishap. 

Hoping that your holidays are wonderful, mishaps and all!

Friday, November 20, 2015

Thankswreathing


Happy Thanksgiving greetings, all! Life seems to have surely sped up within the past month and I feel like a can't get a grip. It's unfortunate given that this is the time of year that we need to slow down and reflect on all that we are grateful for.

Speaking of lack of time, I wanted to update our wreath to something more Thanksgiving-ish and less Halloween-ish. I had about 10 minutes to do so while dinner was simmering. I (of course) used items I already had laying around, so I'd classify this project as Cheapskate. What else would it be?
Here's the finished wreath hanging on our door. My camera is really starting to show its age, isn't it?

I typically like to construct my Thanksgiving wreaths of colors in orange, beige, and/or gold family. After digging through my scrap fabric, I found this strip of orange silk crinkle tablecloth that would be perfect for wrapping the wreath. Leaving the wreath in its natural state would have worked too.
I had plenty of fabric remaining after I wrapped it around one time, and decided it would look cool just to leave the rest hanging.
I also found in my scrap fabric bucket a beautiful sample upholstery fabric piece. The beauty in the fabric samples is that most are selvedge-sewn on the edges so they look nice and neat as they are. No sew! Whoo hoo! I wanted this perfect square of fabric to transform into an oversized bow. A simple accordion fold and wrapping in the center with the hanging piece of fabric did the job.
Oversized bows are floppy. They have to be pinned in place. Locate some sewing pins that match your fabric color to discreetly pin the top of the bow corners in place.
Use another pin to secure the hanging fabric that you wrapped around the center of the bow. Pin in back. Wreath is complete!
Here's to hoping you find a little time to focus on something you enjoy! Happy Thanksgiving!

Sunday, October 11, 2015

Creepy Cheapskate Wreath

Halloween is around the corner, and it should be epic being that it will be observed on a weekend this year! Of course, I cannot neglect the hanging of a spooky wreath to commemorate such a fun annual event. And if you know me, I never follow through with making the same thing twice. B-o-r-i-n-g. Also, you know this wreath will be of a cheapskate variety. Yep. Cheapskate wreath, folks!

I wanted all black this year, with a vintage vibe. I was also craving feathers and lights. I wasn't sure how I wanted it to look, but I just begin and let it all flow from there. Here is what the finished product looked like, before I strung on the tiny LED lights. Apologies for the sub-par photos.
Here's the scoop:
Find the same old scrappy wreath that you use year after year.  This project isn't the cheapest Cheapskate Tip I've shared..I admit that I purchased a few things for this one, rather than utilize items I already have in the house. However, the items I purchased totaled $7! There are so many variations that can be made with these supplies too. I divulge in some other ideas below.
Supplies:
1 feather boa, color of your choice (I purchased this at a craft store)
Paper crepe streamer, color of your choice (purchased at craft store)
Raven, or other creepy object (purchased at dollar store)
Computer/ paper/ printer
Glue stick
Pins
Wrap the crepe streamer around the wreath for full color coverage. Start and finish the wrap with a pin.
Stop what you are doing in attempt to get your sweet but attention-seeking house critter off of your project before it rips.
Give your house critter the attention she deserves. I discovered that my dog looks great in feather boas, and pretty convinced she felt just as glam.
Ok, focus. Anyhow, after pinning the crepe streamer, this is where your imagination can fly. I had an extra amount at the end after I cut it, and wondered what it would look like if I pinned the extra across the inside to make a banner for something to be glued on (as pictured above.) At this moment in time, I had no idea what I was going to glue onto my banner.
Next, grab your feather boa and wrap it over the paper crepe, cognizant of the the length. The boa was a much shorter length, so I had to create distance with the wrap. Again, pin the start and end of the boa to the wreath.
Here's what it looked like. I was loving the texture. I stared at it like this for a while and thought that gluing the word "boo" to the banner is an inexpensive, work-with-what-I-have tactic. I took to my computer and found a font that I was happy with, and arranged the letters in various sizes on one page to ensure one of the sizes would work best. Print page.
Cut out the letters. Since the font is black and will be glued on a black background, I cut outside of the letters so that there was a white outline. I was not a perfectionist with the cutting, as I felt the more erratic my cutting was, the more creepy it would look.
Glue the letters onto the banner with glue stick. Presto. Done.
Close-up of the banner. You of course, do not have to opt for the banner, and could make a black flower with the excess crepe streamer. You could cut the excess and not do anything with the crepe. Another option would be to leave several streams of black crepe hanging from the bottom of the wreath to tickle and scare those who pass by. Maybe next year...too many ideas.
I felt like my wreath needed something else. I wanted it to be black too. I didn't have anything at home that would work, so I made a trip to the dollar store to see what I'd find. I scored this cool raven for, you guessed it...$1.
His feet were already wired underneath so I punctured the wire into the wreath and he stayed put. I wanted illumination next. I had this LED "candle" and propped it underneath the raven. It looked okay but I wasn't quite satisfied.
I had some LED string lights at home so I wrapped the wreath with the string lights. It looks pretty nice at night, and the tiny LEDs aren't too distracting during the day.

What a cinch of a Cheapskate Tip to share this Halloween, and I hope you have a spooky one!

Friday, July 3, 2015

Fireworks at the Door

Happy Fourth of July all! 
I have another Cheapskate Tip that I whipped up last minute...a quick fireworks wreath made with feathers, fabric and any wreath you already own!
Slide in the feathers. The brighter the better! Red (or blue) is best.
After you have the feathers secured symmetrically, you are ready to add fabric.
I had this blue spandex scrap fabric laying around, which made it easy to wrap. Secure with fabric pins.
There was one small area that was a bit of an eyesore so I secured a white silk flower to cover it. I used a white flower to fully represent the red, white, blue color scheme. Any of the materials you use can be colored interchangeably (blue feathers, white fabric, red flower...) It's all about using what you already have laying around!
Fireworks at our door in 5 minutes!

Wishing you all a happy and safe holiday!

Thursday, June 4, 2015

Product Placement

Now that we have finally condensed under one household, we are up to our ears in stuff! I tackled some of it by way of donations, other things by way of clever disguise. I was going through a handful of our magazines recently to determine whether it was absolutely *necessary* to keep so many magazines. I wanted to share this clever drawer organization tip that I found in one of the magazines.
The use of lace and upholstery tacks to buckle in those wild bath products. Brilliant! This is a great Cheapskate Tip because it uses materials you have at home to organize your drawers! I just might try this out, but instead with scrap leather or suede strips.

Another moral to the story...take photos of your favorite magazine articles and blurbs to whittle down on the magazine clutter!

Photo via Better Homes and Gardens magazine.

Tuesday, March 3, 2015

Mishap Remedy

A few years ago, our clothes dryer slowly started to eat our clothing. It mysteriously chewed little holes in our knits and delicates. At random, it made brown permanent stains on our more durable clothing, especially on collars.

Turns out, the drum glides were worn out, causing the dryer drum to sit off balance. Because the drum was off balance, there was a gap at the front of the dryer drum, where our clothes tended to get caught and become marked or shredded from the friction. Hubby fixed the mishap, but it wreaked havoc on a lot of our clothing. Some of the stains eventually disappeared over several years of washing, but other stains remained. The holes are today's reminders of the incident.

One of the victims of the dryer drum mishap was Hubby's beloved button-down shirt. The collar looked like it fell into poop. Not a good look. He was pretty partial to the shirt and resents the dryer to this day. I told him that I'm up for the challenge of fixing his shirt (somehow) so that he did not have to part with it. He married a Cheapskate, after all!
Here's a close-up view of the stain on his collar. I decided to stencil something over the stain to correct this mishap. I used contact paper as my stencil material and drew something Hubby is obsessed with--sailboats. After drawing, I cut the design carefully with an X-acto knife. I peeled off the backing of the contact paper and re-positioned the stencil several times to ensure it adequately covers the stain.
Anytime you work on a specific facet of clothing, it's a good idea to back off and look at it once more before beginning work. Allow the shirt hang naturally, to ensure the new "art-dition" (*pun, intended*) hangs at a level view when worn. 
I used fabric paint and a sponge brush, and lightly dabbed in the negative space of the handmade stencil. Allow to dry, THEN peel off stencil. There were still a few brown marks underneath the boat so I free-handed some ocean waves to masque the stains accordingly.

Hubby was happy he could keep his shirt and loved the nautical theme. Fix some of your ruined clothing with personalized paintwork. There is a remedy for everything.

Saturday, February 14, 2015

Happy VD!

Well, I suppose this isn't the type of holiday to abbreviate. But I would say the holiday is quite "infectious"! I know, bad joke.
However you are celebrating, or if you are not, always keep love in mind. 
Quickie wreath project: use anything you have laying around the house to make your own love-ly wreath. In this case I used a mini balloon that came with a plant that Hubby gave me for last year's Valentine's Day, a red clip-on bow tie and a gold chair sash. Only took five minutes! 

Tuesday, November 11, 2014

Wreathing Around

Much of the US has received much colder weather temperatures by now, thanks to Super Typhoon Nuri pushing the arctic air southbound.

This snuggly weather combined with the looming holidays ahead had me in the mood to decorate. Yet, I'm not mentally prepared to surround our home with all things Christmas. Let's just take each holiday one step at a time, okay?

As you know from my previous posts, I'm a sucker for door wreaths. I grabbed my basic vine wreath (that I use for every occasion) and wrapped it for warmth with burlap. 
I decided that leaving the frayed end hanging looked pretty neat. To retain my wreath's many looks, I fastened the burlap with a safety pin in the back, as it strong yet impermanent. 

Now, a turkey is needed for this Thanksgiving wreath. I had a piece of this pretty laser-cut card stock from a wedding I attended last year. *I know, I have a hoarding problem!*
The "lace" portions of the card stock looked like turkey feathers to me. They just need a bit of a re-arrangement. 
Glue together. I used hot glue because of its strength and speediness. 
I left the pointy portions of the paper alone, since I imagined them as turkey legs. I cut a free-handed circle and glued on as the bodice. Sometimes imperfection is best. The button topped off as its head--holes make the eyes. I'm going for abstract here.
My little pretty turkey needed a beak. I went through my craft supplies and found an orange feather and cut the base of the quill for use of the beak, gluing on of course.

This little turkey cost me nothing! Zero. Zilch. This wreath didn't cost me a dime. I utilized items I already own and love the challenge of creating something new each season. 

Now, to complete the wreath, I pinned in a cluster of cranberries (that I have had forever) and hung a sweet starburst ornament we bought last year for our mid-century home. Little Miss Turkey found herself a spot too. She was attached with floral wire.

Happy Thanksgiving!